04/01/2025
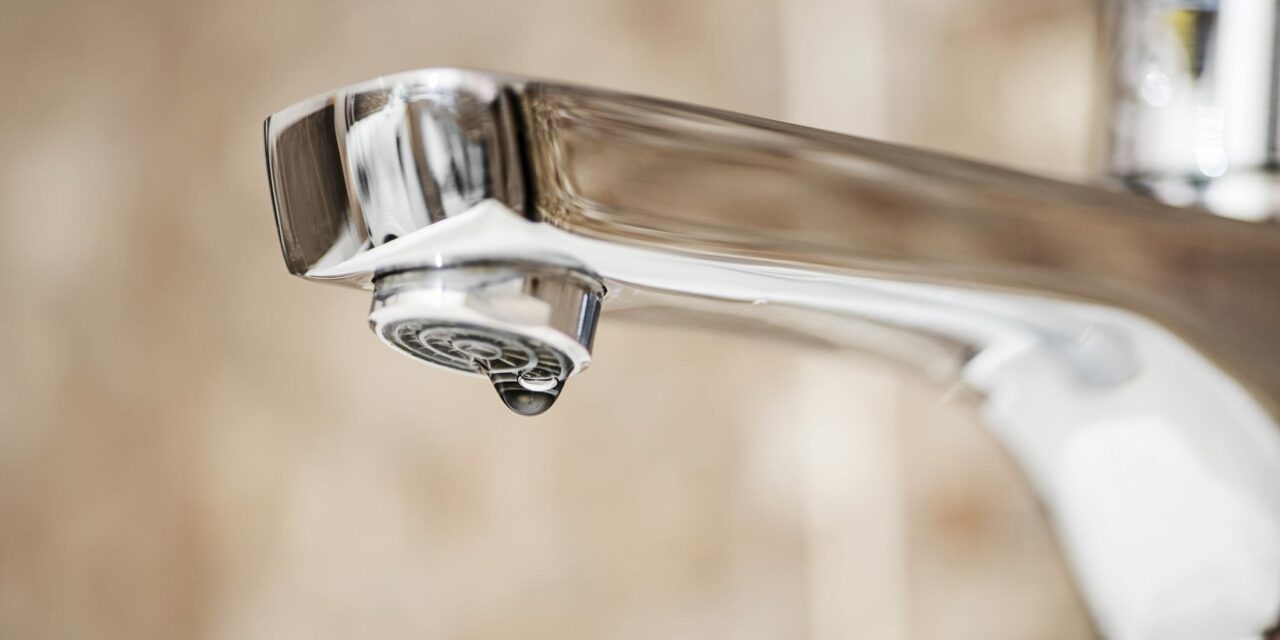
A dripping tap is a common household issue that can lead to significant water wastage and increased utility bills if left unaddressed. Fortunately, fixing a dripping tap is a manageable task that most homeowners can undertake with the right guidance. This comprehensive guide will walk you through the process, ensuring you can tackle the repair confidently and effectively.
Understanding Tap Types
Before beginning any repair, it's crucial to identify the type of tap you have, as the repair method varies accordingly. The most common types are:
Compression Taps: These traditional taps have separate handles for hot and cold water. They operate by compressing a rubber washer to stop water flow.
Cartridge Taps: These can have either one or two handles. The internal cartridge moves up and down to control flow and left to right to control temperature.
Ceramic Disc Taps: A modern design featuring a single lever. They use two ceramic discs to control water flow.
Safety First: Preparing for the Repair
Turn Off the Water Supply: Locate the isolation valves under the sink and turn them clockwise to shut off the water. If isolation valves are absent, turn off the main water supply to your home.
Drain the Residual Water: Open the tap fully to allow any remaining water to drain out, ensuring a dry working area.
Plug the Sink Drain: Use a sink plug or a cloth to block the drain. This precaution prevents small parts from falling into the drain during the repair.
Gather Necessary Tools: Depending on your tap type, you may need:
Adjustable spanner or wrench
Screwdrivers (both flat-head and Phillips)
Allen keys
Replacement parts (washers, O-rings, cartridges)
Plumber's grease
Cleaning materials (cloths, vinegar for descaling)
Step-by-Step Repair Guide
For Compression Taps:
Remove the Tap Handle: Pry off the decorative cap to expose the screw. Unscrew it and gently remove the handle.
Extract the Valve: Use an adjustable spanner to loosen and remove the valve stem, revealing the washer beneath.
Replace the Washer: Remove the old washer, noting its size. Replace it with an identical new washer, ensuring a snug fit.
Inspect and Replace O-Rings: If the tap is leaking around the handle, examine the O-rings on the valve stem and replace them if worn.
Reassemble the Tap: Reverse the disassembly process: insert the valve stem, tighten it, replace the handle, and secure it with the screw and decorative cap.
For Cartridge Taps:
Remove the Handle: Pry off the decorative cap and unscrew the handle. Lift it off to expose the cartridge.
Extract the Cartridge: Remove any retaining clips or nuts. Pull out the cartridge, noting its orientation.
Replace the Cartridge: Obtain an identical replacement cartridge. Insert it into the tap body in the same orientation as the old one.
Reassemble the Tap: Replace any retaining clips or nuts, reattach the handle, and secure it with the screw and decorative cap.
For Ceramic Disc Taps:
Disassemble the Tap: Remove the handle to expose the ceramic disc cartridge.
Extract the Cartridge: Unscrew any retaining screws and lift out the cartridge.
Inspect and Clean: Check the cartridge for damage. If it's in good condition, clean it with vinegar to remove limescale. If damaged, replace it.
Reassemble the Tap: Insert the cleaned or new cartridge, secure it with screws, and reattach the handle.
Post-Repair Steps
Restore the Water Supply: Slowly turn the water supply back on to prevent a sudden surge of water pressure.
Test the Tap: Open and close the tap to ensure smooth operation and check for leaks.
Check Water Flow: Ensure both hot and cold water flow correctly, and the tap no longer drips when turned off.
Preventative Maintenance Tips
Regularly Inspect Taps: Periodically check taps for signs of wear or leaks to address issues promptly.
Clean Aerators: Remove and clean tap aerators annually to prevent reduced water flow due to mineral buildup. Aerators can often be unscrewed and cleaned using a vinegar solution to dissolve limescale.
Monitor Water Pressure: Excessive water pressure can accelerate wear and tear on taps. If you notice unusually high pressure, consider installing a pressure-reducing valve.
Replace Parts Regularly: Components like washers, O-rings, and cartridges have a limited lifespan. Replacing these parts at the first sign of wear can prevent leaks and extend the life of your taps.
Use Taps Gently: Avoid overtightening taps when turning them off. This can cause unnecessary strain on internal components, leading to premature wear.
Common Issues to Watch Out For
Even after repairing a dripping tap, it’s essential to stay vigilant for common issues that might arise, such as:
Persistent Dripping: If the tap continues to drip, double-check the installation of replacement parts. Ensure they are the correct size and properly seated.
Low Water Flow: If water flow is weaker than expected after the repair, inspect the aerator or check for potential blockages in the pipes.
Handle Stiffness: Over time, mineral deposits can cause handles to become stiff. Regular cleaning and lubrication with plumber’s grease can resolve this.
Recurring Leaks: If leaks reappear shortly after the repair, the issue might lie deeper within the plumbing system, such as a faulty valve seat or water pressure problems. Consulting a professional plumber in such cases is recommended.
When to Call a Professional
While many homeowners can successfully fix a dripping tap, there are situations where professional help is advisable:
If the tap continues to drip despite multiple repair attempts.
If the internal parts of the tap are corroded or damaged beyond repair.
If the tap is part of a complex plumbing system, such as a wall-mounted or specialised unit.
If you’re unsure about turning off the water supply or completing the repair safely.
Professional plumbers have the tools and expertise to diagnose and fix more complicated issues, ensuring long-term solutions.
Environmental and Financial Benefits
Fixing a dripping tap is not just about convenience. It also brings significant environmental and financial advantages:
Water Conservation: A dripping tap can waste up to 15 litres of water per day. Repairing it helps conserve this precious resource, especially during periods of drought.
Lower Utility Bills: Addressing drips promptly can reduce your water bills, saving you money over time.
Preventing Structural Damage: Persistent drips can lead to water damage in cabinets, floors, or walls. Fixing drips early helps avoid costly repairs in the future.
Summary
Repairing a dripping tap is a practical skill that every homeowner can benefit from learning. By understanding the type of tap you have, gathering the right tools, and following the step-by-step process outlined in this guide, you can tackle most drips with confidence.
Key Takeaways:
Identify the tap type before starting.
Always turn off the water supply and prepare your workspace.
Replace worn parts, such as washers, cartridges, and O-rings.
Perform regular maintenance to prevent future drips.
By taking these steps, you not only save water and money but also gain the satisfaction of handling a household repair on your own. For more complex issues, don’t hesitate to seek professional assistance.